500GB Whole Home PVR Upgrade Instructions for VIP1216
Note:
By upgrading to the new PVR you will lose all recorded programs on your current PVR.
If you are upgrading to the new 500GB Whole Home PVR use these instructions to:
- Disconnect Your Current PVR
-
Unplug all of the cables from the back of your VIP 1216 PVR.
Tips:
- Connecting your new PVR will be easier if you leave the other end of the cables plugged into your TV, stereo and other devices.
- You may want to label where the cables came from when you unplug them so that it is easier for you to reconnect your new PVR.
- Unplug the power cord from the wall and package with the PVR to take to a Bell MTS store.
- You should be left with the following cables plugged into your TV, stereo and other devices ready to plug into your new PVR:
- HDMI or component cable
- Ethernet cable (looks like a thick phone wire)
- Optional - RF cable
- Optional - Optical audio (you will likely have this cable if you have a newer stereo system)
- Optional - RCA cables (may be used for sound or stereo systems)
- Use our Store Locator to find your nearest Bell MTS store. Go to that store and bring with you:
- the authorized account holder for your account (this is usually the person whose name is on your monthly bill)
- your current PVR
- the power cord for your current PVR
Note:
Your Bell MTS remote controls will work with your new PVR. Do not return them.
-
- Reconnect Your New PVR
- Insert the Network/Ethernet cable from the wall into the back of your PVR.
- Insert one end of the power cord into the back of your new PVR, plug the other end of the power cord into the wall outlet.
- Reconnect the appropriate cables from your TV and/or stereo into your new PVR.
Important:
- Use only the power cord supplied with the new PVR.
- Return your previous power cord with your previous PVR, as it is not compatible with your new PVR.
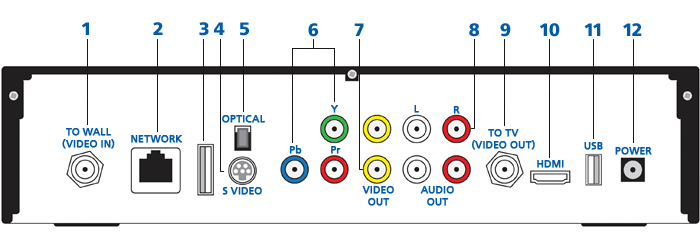
1 Coaxial input - from wall. 2 Network/Ethernet In – connects the Ethernet cable from your home network or modem. 
3 eSATA (disabled) 4 S-Video - S-Video is preferred for older TVs. 
5 Optical audio – this is an all-digital audio connection. It is ideal for audio receivers. 
6 Y/Pb/Pr/Composite 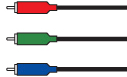
7 RCA Composite - these connections are ideal for VCRs and older TVs. 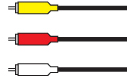
8 RCA Composite - these duplicate connections are available for users with multiple devices. 9 Coaxial output - to TV 10 HDMI - the highest fidelity HD connection that contains both audio and video signals. Use for HD TVs. 
11 USB Port (disabled) 12 Power source - Start Up and Synchronize Your New PVR
This step can take up to 20 minutes to complete.
- Turn on your TV and your new PVR using your remote control.
- You will have to wait up to 20 minutes while your new PVR synchronizes with the Bell MTS Fibe TV network. You may see an image of gears on your TV screen, or you may see nothing at all.
- Once you can see TV channels, it may take a few more minutes for the TV guide to appear.
- Next, you need to confirm that the software was installed correctly.
- Press MENU.
- Highlight Settings, press OK.
- Highlight General, press OK.
- Highlight System Information, press OK.
- Check the number next to "Client version". It should read: 3.2.34263. If you see a different number, please call customer care at 204 225-5687.
- Personalize Your New PVR
You will have to reset the following features in the Settings section of your TV menu. For instructions, refer to:
- Parental Locking settings, including Locking Rentals PINs
- Change Aspect Ratio
- Closed Caption
- Set up Favourite Channels
- Bell MTS Fibe TV Call Display - Message Centre options
Notes:
- My Picks and Ultimate Picks are not compatible with the new 500GB Whole Home PVR.
- You do not have to reset existing series or upcoming one-time recordings from your previous PVR - they will continue to record on your new PVR.